Experience India together… A new discovery each week
We’re excited to introduce you IndianTies Email Explorers—a weekly journey through India. You can sign up for weekly emails all about India – perfect to share with your kids. It’s a simple way to keep discovering India from home, with fresh adventures arriving right in your inbox.
And the best part? It’s FREE… here’s a sneak peek!
Lets go to Tamil Nadu!
Welcome Explorers!
Did you know that in some villages in Tamil Nadu, people make giant colorful drawings on the ground using rice flour to feed ants? These designs, called kolam, are made every morning outside homes to bring good luck and share food with tiny creatures. Tamil Nadu is full of surprises like this—fun traditions, tasty foods, and festivals that light up the streets. Everywhere you look, there is something strange, wonderful, or surprising waiting to be discovered.
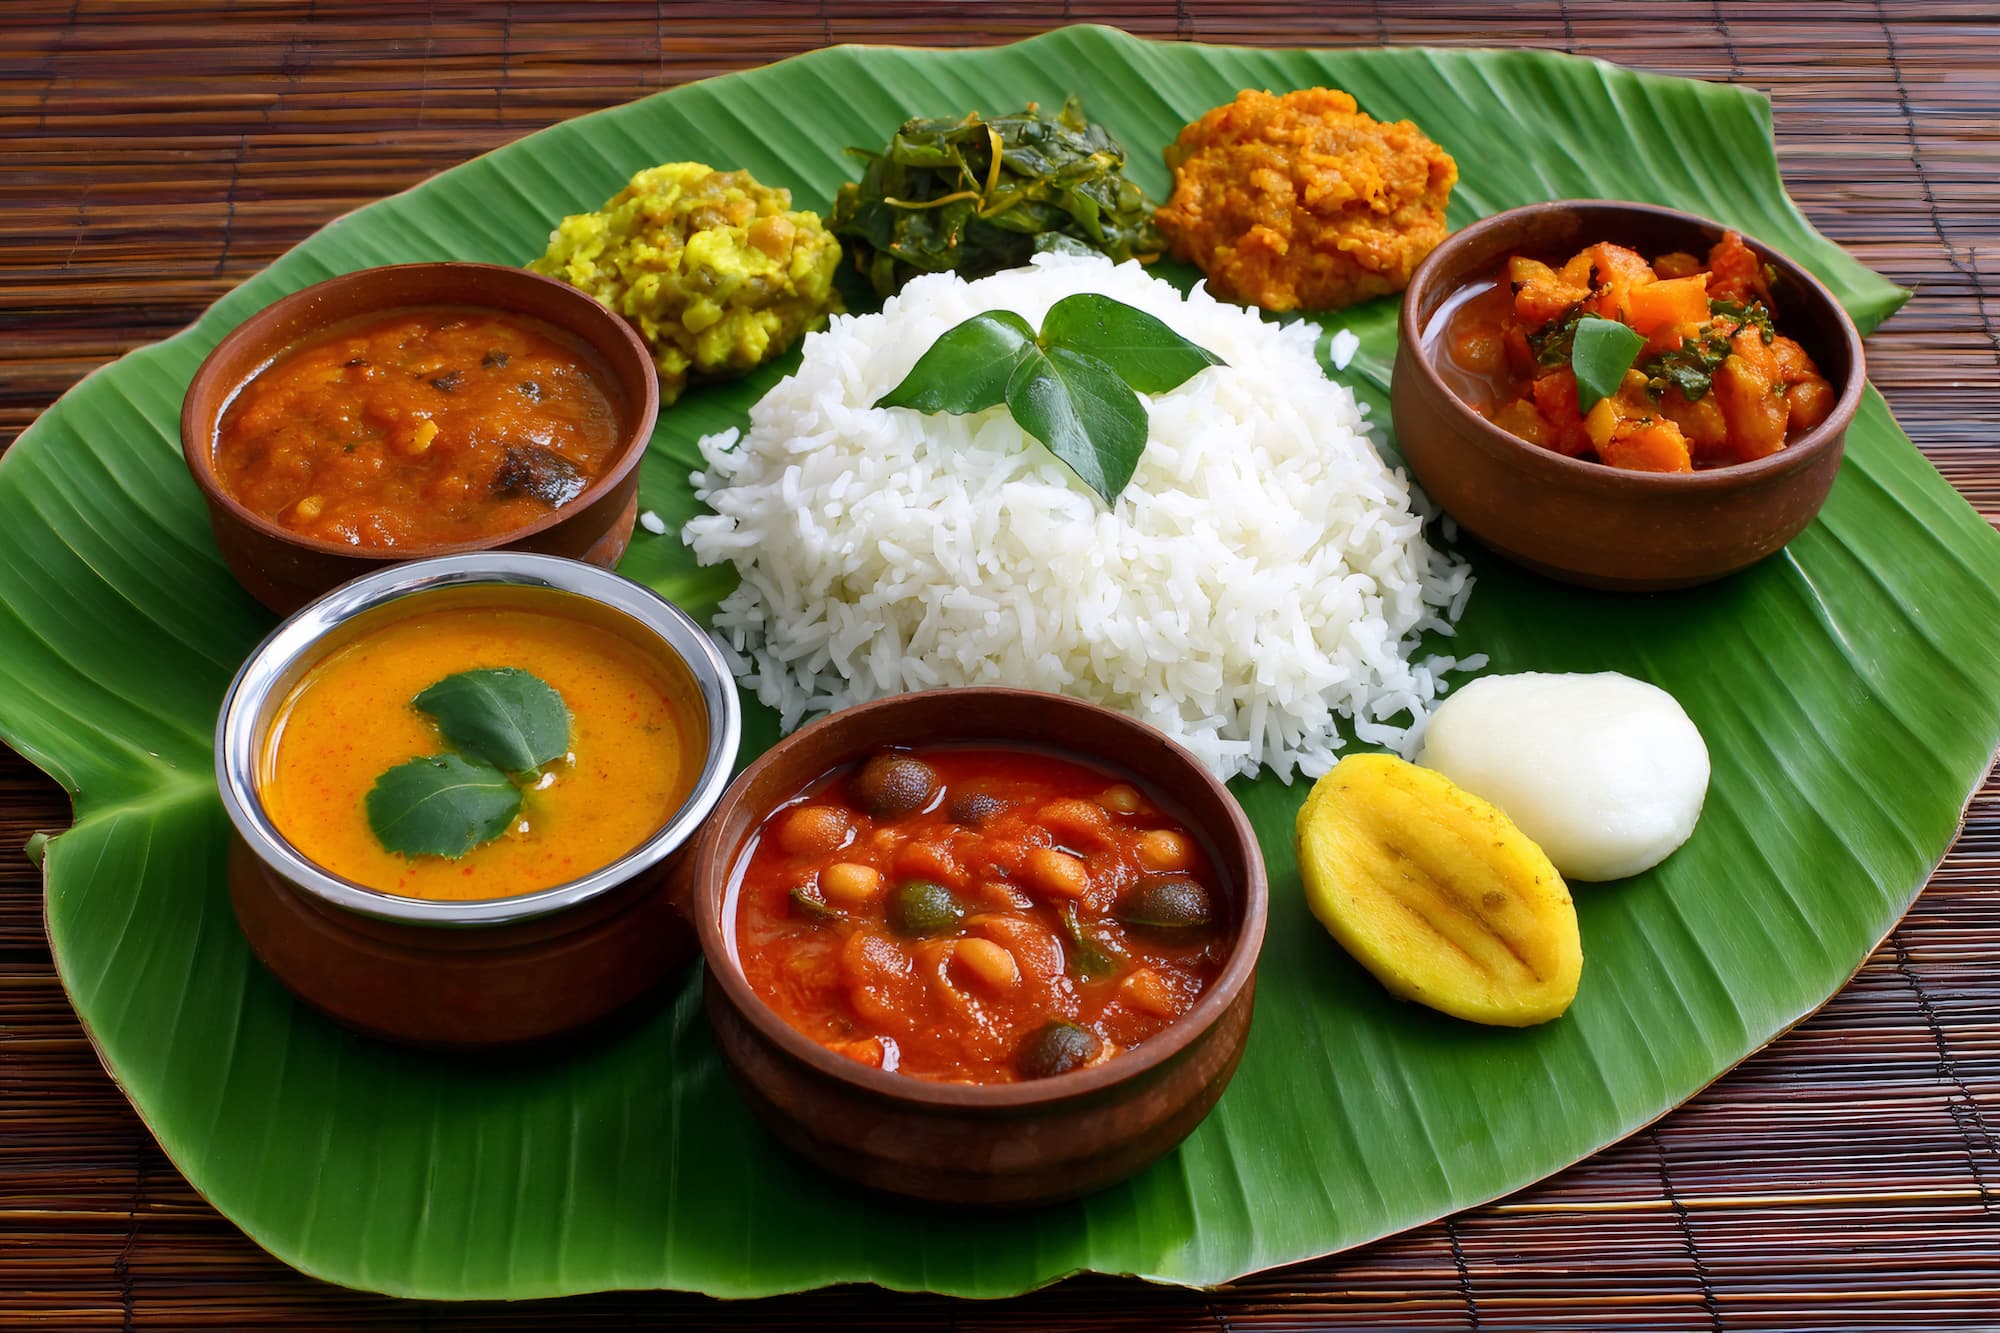
Feast on a banana leaf!Did you know that in Tamil Nadu, meals are often served on big green banana leaves instead of plates? It makes eating feel like a special adventure! You might find idli, soft and fluffy rice cakes, dosa, thin and crispy rice crepes, and sambar, a tangy and tasty lentil stew. Many dishes use coconut, giving the food a sweet, tropical twist.Banana leaves aren’t just fun—they’re also eco-friendly! After the meal, the leaves can be composted or used as food for animals, so nothing goes to waste. Every bite is a little surprise for your taste buds, and you’re helping the planet at the same time. Imagine picking up your food with your hands and tasting flavors that kids and families have enjoyed for hundreds of years.
How to make homemade whole-wheat Indian flatbread (tortillas)
There’s something deeply comforting about a fresh, warm roti straight off the skillet. In our house, we’ve been making roti (also called chapati) for years—sometimes daily. Whether you’re serving it alongside a hearty curry or just spreading a bit of ghee on top for a quick bite, nothing beats homemade.
When I used to work as a graphic designer for a Punjabi magazine, my colleagues would always greet me with a warm and familiar phrase: “Roti khayi?” (ਰੋਟੀ ਖਾਧੀ?) — which means “Have you eaten?” It might sound like a simple question, but in Punjabi culture (and much of India), it’s a way of showing care and connection. Asking if someone has eaten is another way of saying, “I’m thinking about you.”
What I love most about this recipe is how flexible it is. You can make the dough in advance and just take what you need when you’re ready to cook. It’s a time-saving trick that helps especially during busy weekday dinners.
Dough Tips from Our Kitchen
We’ve tried everything over the years—kneading by hand, using a bread machine, and even the KitchenAid stand mixer. Honestly, using a mixer makes things much easier, especially when prepping for a big family.
Pro Tip: Let the dough rest at least 30 minutes. It makes it easier to roll and keeps your roti soft—not stiff or chewy.
Cooking Technique: Cast Iron or Bust
We prefer using a cast iron skillet or a traditional tawa, which holds heat beautifully. Once your roti is rolled out, place it on the hot tawa until bubbles start to form—flip, cook until lightly golden, then flip once more and press gently to puff it up. You’ll smell the magic.
Storage Tip
To keep your rotis soft and warm, store them immediately in a container with a lid. We use this one and love it:
Check it out on Amazon – Roti Hot Pot (affiliate link)
In a large bowl (or bread machine or stand mixer), combine flour and salt. Gradually add warm water and knead until soft and pliable—about 8 minutes by hand, 4–5 minutes by mixer.
Cover with a damp cloth and let rest for 30 minutes to 1 hour.
Divide dough into 8 equal balls. Roll each one on a lightly floured surface into a 6–7 inch circle.
Heat a cast iron skillet or tawa over medium-high. Place one roti at a time and cook until bubbles form (about 30–45 seconds). Flip and cook the other side (about 30 seconds), then flip once more and press gently to puff.
Immediately transfer to a container with a lid or wrap in a clean towel. Serve hot.
FAQ
Q: Can I knead roti dough in a bread machine or mixer? A: Yes. A dough setting on a bread machine or a stand mixer with a dough hook works wonderfully and saves time.
Q: Why is my roti stiff? A: This usually means the dough didn’t rest long enough, or you used too much flour while rolling. Let the dough rest, and use just enough flour to prevent sticking.
Q: How far ahead can I make the dough? A: You can refrigerate roti dough for 2–3 days. Just bring it to room temp before rolling.
Q: Do I need a tawa? A: A cast iron skillet works just as well.
Bonus: Rotimatic Review
For those nights when you’re short on time—or when you’re making rotis for a big group—the Rotimatic has been a lifesaver.
We’ve done both: hand-rolled and machine-made. For our big family, the Rotimatic offers serious convenience. You get hot, fresh rotis with the push of a button. If you make roti regularly, this machine can honestly be a game-changer.
If you’ve ever had warm, freshly made naan with dinner, you know just how good it is. Soft, slightly chewy, and full of flavor—it’s no wonder it’s a favorite in so many homes. This homemade naan recipe is one I’ve made dozens of times, and every time I serve it, someone asks if it came from a restaurant. It’s that good.
A quick note: “naan” already means bread in many South Asian languages, so saying “naan bread” is technically like saying “bread bread.”
Ingredients (Makes 8 pieces)
2 teaspoons active dry yeast
1 teaspoon sugar
½ cup warm water
2½ to 3 cups all-purpose flour
½ teaspoon salt
¼ cup olive oil
⅓ cup plain yogurt
1 large egg
How to Make Naan at Home
Follow these steps for great naan bread at home!
In a small bowl, mix the warm water, sugar, and yeast. Stir and let it sit for about 5–10 minutes until it looks foamy on top.
In another bowl, whisk together the olive oil, yogurt, and egg.
In a medium bowl, mix 1 cup of flour with the salt. Add the yeast mixture and the oil/yogurt/egg combo. Stir it all together. Start adding more flour, about half a cup at a time, until it becomes too thick to stir.
Knead it
Move the dough to a floured surface and knead for about 3 minutes, adding a little more flour if it sticks. The dough should feel soft and smooth—kind of like a squishy pillow but not too sticky.
Let it rise
Put the dough in a lightly oiled bowl, cover it, and let it rise in a warm spot until it doubles in size. This usually takes about an hour.
Shape it
Once it’s risen, press the dough down gently and divide it into 8 pieces. Roll each piece into a small, flattened ball. Cover the balls with a clean kitchen towel, and let rest for about 10 minutes.
Heat a large skillet (cast iron works great!) over medium heat. Roll out one dough ball until it’s about 6 inches wide and ¼ inch thick. (I like to roll out all of my dough balls at one time, so I can cook the naan quickly.). Allowing the dough to rest again helps if you have time. Before cooking, stretch the dough as thin as you can without tearing it. Place it on the hot skillet, and cover with a lid for a couple of minutes until bubbles form and the bottom is golden. Remove the lid, and flip and cook the other side, leaving uncovered. Repeat with the rest of the dough balls.
Stack your cooked naan in a deep bowl with a lid and brush them with melted ghee. This will keep them soft and warm until you serve them.
Enjoy!
Shortcut: Use a Bread Machine
Here’s a tip I use almost every time: I let my bread machine handle the dough. Just toss all the ingredients in, select the dough cycle, and let it do its thing. You don’t even have to wait for the full cycle to finish—once it’s started to rise, you’re good to go. It’s a big time-saver.
If you don’t have a bread machine, they’re easy to find second-hand at thrift stores. Or, if you’re looking to buy one, here are some great options. (These are affiliate links, so I may earn a small commission at no extra cost to you.)
Can I use instant yeast instead of active dry yeast? Yes, you can. Just skip the step where you activate it in water—mix it straight in with the flour.
How do I store leftovers? Store naan in an airtight container at room temperature for up to 2 days. You can also freeze it. To reheat, use a skillet or warm oven for best texture.
Can I make it without a bread machine? Definitely. The recipe works just fine by hand or with a stand mixer. The bread machine just saves time.
Can I add other flavors? Yes! Try adding minced garlic, chopped cilantro, or a bit of nigella seed either to the dough or on top after cooking.
Restaurant-Style Homemade Naan: Indian Flat Bread Recipe
Recipe by Heather ChatterjeeCuisine: Indian
Servings
8
servings
Prep time
10
minutes
Cooking time
30
minutes
Calories
220
kcal
Makes about 8 naan. Double the recipe for a large family or for company!
Ingredients
2 teaspoons active dry yeast
1 teaspoon sugar
½ cup warm water
2½ to 3 cups all-purpose flour
½ teaspoon salt
¼ cup olive oil
⅓ cup plain yogurt
1 large egg
Directions
In a small bowl, mix the warm water, sugar, and yeast. Stir and let it sit for about 5–10 minutes until it looks foamy on top.
In another bowl, whisk together the olive oil, yogurt, and egg.
In a medium bowl, mix 1 cup of flour with the salt. Add the yeast mixture and the oil/yogurt/egg combo. Stir it all together. Start adding more flour, about half a cup at a time, until it becomes too thick to stir.
Move the dough to a floured surface and knead for about 3 minutes, adding a little more flour if it sticks.
Put the dough in a lightly oiled bowl, cover it, and let it rise in a warm spot until it doubles in size. This usually takes about an hour.
Once it’s risen, press the dough down gently and divide it into 8 pieces. Roll each piece into a small, flattened ball. Cover the balls with a clean kitchen towel, and let rest for about 10 minutes.
Heat a large skillet (cast iron works great!) over medium heat. Roll out one dough ball until it’s about 6 inches wide and ¼ inch thick. (I like to roll out all of my dough balls at one time, so I can cook the naan quickly.). Allowing the dough to rest again helps if you have time. Before cooking, stretch the dough as thin as you can without tearing it. Place it on the hot skillet, and cover with a lid for a couple of minutes until bubbles form and the bottom is golden. Remove the lid, and flip and cook the other side, leaving uncovered. Repeat with the rest of the dough balls.
Stack your cooked naan in a deep bowl with a lid and brush them with melted ghee. This will keep them soft and warm until you serve them.
Enjoy!
Notes
Shortcut – use a bread machine to prep the dough – it’s a great time saver!
Final Thoughts
Homemade naan isn’t hard to make, and once you try it, you might not want store-bought again. It’s perfect with curry, grilled meats, or just slathered in butter. The leftovers (if you have any!) make a great personal pizza base. We like to add leftover butter chicken and top with mozzarella for an Indian pizza! The bread machine trick makes homemade naan even easier on busy nights—and trust me, once your family tries it, they’ll ask for it again and again.
Give it a try and let me know how it turns out. I’d love to hear what you serve it with—or how you make it your own!